

With some easy adjustments, you can still get that fresh, dewy look and feel confident that your makeup looks great on your skin!
My insanely talented friend Melissa Franklin, founder of M. Franklin Studio and Boutique, was kind enough to treat me to a “makeup makeover” after I complained that my makeup suddenly seemed to stop working well with my skin. I’ve been using the same brands for years and have always been happy with them. I’m a low-maintenance gal when it comes to make-up. I don’t have the patience or time for long makeup routines, On work from home days, I typically opt for concealer, powder, blush, mascara and a little touch-up for the eyebrows. I’ve never liked the feeling of heavy make-up, or anything greasy on my face. If I’m going to an office or out for an evening, I’ll add a little eyeshadow and eyeliner to my routine, but that’s about it.
While chatting with Melissa during my makeover, I asked her what she thinks the biggest mistake is that women over age 40 make when it comes to their makeup routine. Her response: “For some reason, women reach a point where they give up on makeup. Their skin changes and their old makeup becomes unsuitable. Instead of trying to find products that work better with the changes in their skin, they just quit wearing makeup altogether. What they don’t realize is that a combination of the right makeup and good technique can be used to pull the eye away from the aspects that you don’t want to call attention to.
Wearing less or no makeup at all isn’t the answer. The key is to find the right products that enhance your best features while providing coverage for those less-than-perfect areas of your skin. It may mean a change to your routine, but it’s worth it!
Melissa Franklin, founder of M. Franklin Studio and Boutique
10 Must Try Makeup Tips For Mature Skin
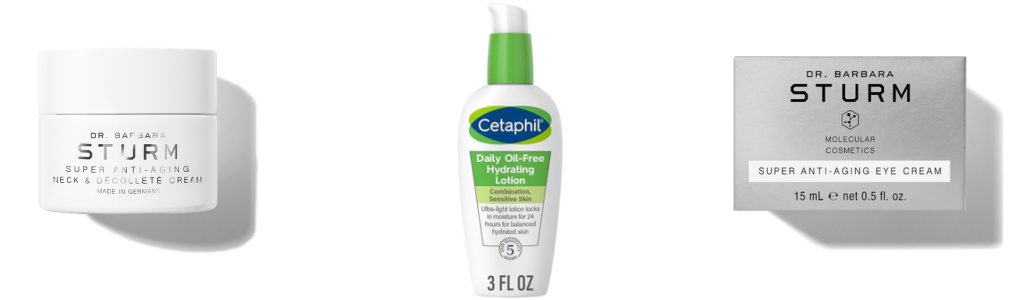
1. Start with a clean, well-moisturized canvas. The combination of dry skin plus wrinkles serves as an invitation for your makeup to settle into the cracks and crevices in your skin. Nobody wants that! These are my favorite three moisturizers: Dr. Sturm’s Super Anti-Aging Neck & Decollete Cream, Cetaphil Daily Oil-Free Hydrating Lotion, and Dr. Sturm’s Super Anti-Aging Eye Cream
2. Repeat after me: P-R-I-M-E-R = PRIMER. A woman with mature skin needs a super-hydrating primer that is lightweight, not thick or sticky. Primers help smooth the surface of your skin, blur wrinkles, even out your skin tone, and they help your makeup stay in place longer by giving it something to “grip” to. Ever felt like the minute you walked out the door, your makeup slid right off your face? Well, primer helps prevent that. Those of us with mature skin should look for primers with extra moisturizing benefits along with anti-inflammatory ingredients like hyaluronic acid and peptides.. Melissa also recommends avoiding the silicone based primers, as they tends to settle in the wrinkles, making them stand out more. I personally prefer a primer that is mostly if not all natural.
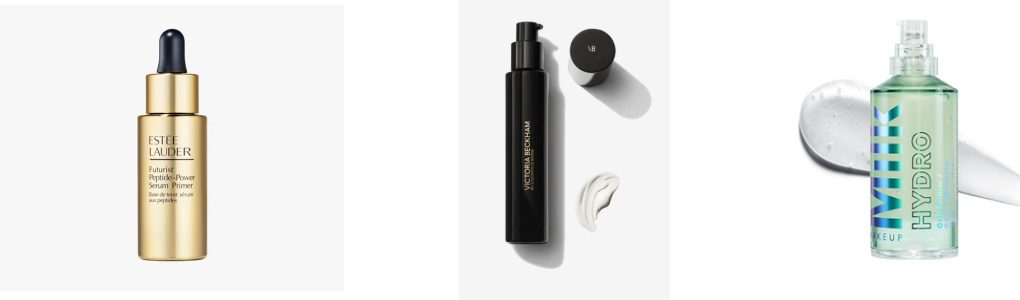
I have to admit, this isn’t a normal step in my routine so this is an adjustment I’m still getting used to. I’m on the hunt for the perfect primer, so if you have one you like, drop a comment below. I don’t like anything that feel sticky or heavy on my face. Here are the three most recommended by makeup professionals. I’m considering the Estée Lauder version: Estée Lauder Futurist Peptide Power Serum Primer, Victoria Beckham Cell Rejuvenating Priming Moisturizer, Milk Makeup Hydro-Grip Primer
3. Invest in a good concealer. This little product packs a powerful punch. It can hide dark circles and hyperpigmentation, brighten your eye area, and give the impression of wider, more open eyes. That explains why concealers are projected to be a $9.9B market by 2028.
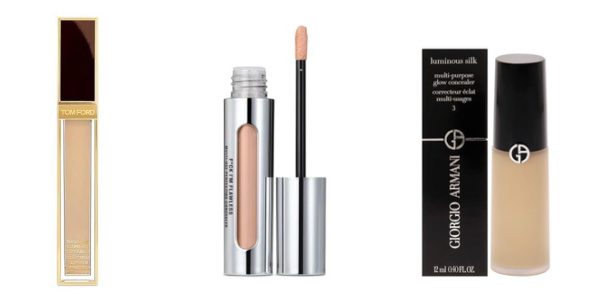
Products that work well for mature skin is a growing market. Make sure you look for nourishing formulas that won’t settle into the fine lines around our eyes, or look cakey on dry skin. Look for formulas that have plenty of hydration and a “glow effect”. Avoid anything that is matte. Favorites of the professionals include: Tom Ford’s Shade & Illuminate Concealer, Il Makiage’s F*ck I’m Flawless Multi-Purpose Perfecting Concealer, Giorio Armani Luminous Silk Concealer. I love Il Makiage, it will cover just about anything and stay put all day. Their online color selection tool is remarkably accurate.
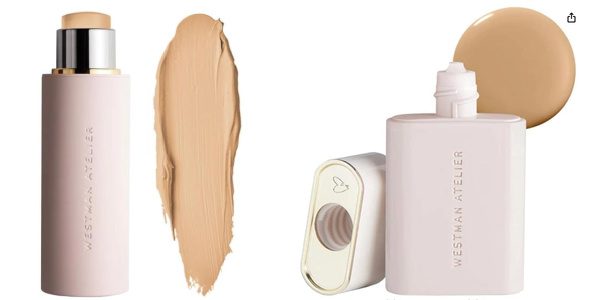
4. Don’t skip the foundation! Melissa’s advice is to ditch the powder and instead invest in a good foundation. It’s less apt to cake into your pores and fine lines. Apply it lightly for daytime minimalist look, or build it up a bit more for a dramatic evening look. Just like concealers, look for a foundation that is hydrating for that dewey look. I’m not going to bother with multiple recommendations for this category. The favorite choice for mature skin, by far, of celebrities, makeup professionals and non-celebrities alike is Westman Atelier brand in either the Vital Skin Foundation Stick or Vital Skincare Complexion Drops.
5. Eyebrows can change the entire shape of your face and eyes – don’t neglect them! This has been the hardest lesson for me to learn, and I didn’t even learn it until I was in my late 40’s. I’ve never had thick, beautifully shaped eyebrows. They’ve always been thin and sparse. I really never paid any attention to them at all until my daughter became old enough to get interested in make-up. She has gorgeous natural brows, but still spend a little time shaping and filling them in. I realized that my face looked naked compared to people with beautiful brows.

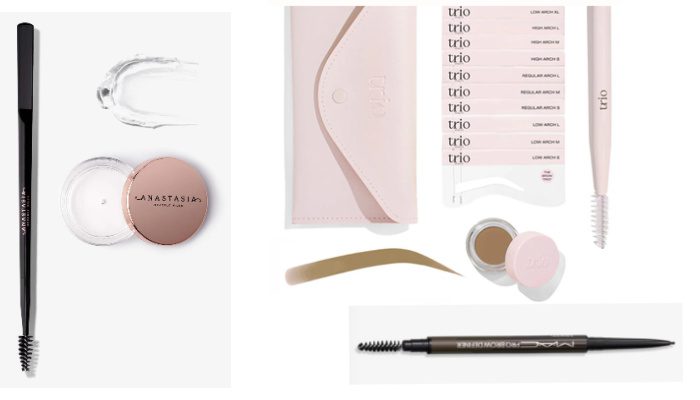
I tried for a while to rely only on makeup products to draw in a brow, but it required me to follow the shape of my sparse natural brows, which was a bit too droopy for the shape of my eye and took a ton of time. A couple of years ago I gave in, and went the permanent makeup route – with ombre brows and a few digital hair strokes. I love not having to worry about my brows any more, and having a well-shaped brow helped to lift the appearance of my eyelids and better define the shape of my face.
Whether you get permanent eyebrows, or use pencils, pomades, and tints, Melissa encourages you to make your brows a regular part of your routine. Even if you skip eyeshadow, don’t skip your brows! Before I had permanent brow makeup, my favorite tools for drawing in / accentuating my own brows are pictured above. The brow gel from Anastasia is the strongest brow gel I could find on the market – meaning it will hold those wacky brows to a smooth shape and in the direction that you desire and it will hold ALL DAY LONG. It has a consistency somewhere between gel and wax. The brush that comes with Anastasia’s Brow Freeze Duo Kit is perfect for styling and “freezing” your brows in place while the gel takes a few seconds to dry. Next up is the Brow Trio Stencil Kit by Brow Trio Beauty, which is absolutely the best kit for beginners or if you have a lot of space to fill in (translation, your brows are sparse to non-existent. I love this kit because it comes with a set of stencils you can hold up to your forehead, and a special sponge applicator that you dip into the pomade and then pat onto your upper eye area inside the stencil. No more worrying about freehand drawing that perfectly shaped brow! It’s brilliant! This stuff has staying power too, even on hot, sweaty days. Lastly, to draw fine lines that look like brow hairs, I love the new MAC Spiked Pro Brow Definer Pencil. It’s the finest point on the market right now at 1mm, and it’s waterproof and smudge proof. I still use this pencil to fill in a few hairlike strokes until I can go back for a touch-up now that my ombre shade has started to fade a bit.

6. Melissa is a big fan of contouring because with practice, it can really help to correct asymmetrical shapes, or shapes that are too wide, too narrow, too long, etc. There are a lot of makeup tutorials on YouTube that explain how to do contouring. Melissa says the key is to avoid overdoing it. Too much contouring stick or bronzer can look harsh when instead you want to go for a natural look. The best areas are along the jawline, around the top of
The most common areas are along the jawline, around the top of the forehead / hairline, and down each side of the nose or across the point of the nose. Cream sticks are preferred to bronzing powder, as the powder will settle in the fine lines of your face and can be harder to blend in for a natural look. You can use a brush to blend it in. Once again, Westman Atelier wins for best mature skin contour stick due to its creamy, moisturizing, blendable consistency.
7. Lips, Lips, Lips! I’m the worst for not wearing anything on my lips other than Burt’s Bees. I know – not very fancy, right? I don’t like sticky lip glosses, or worrying that I have lipstick on my teeth so I’ve always had trouble finding a lip product that I’m willing to use every day. As Melissa stressed during my makeover, ignoring my lips is like ignoring my eyebrows. It leaves the bottom half of my face unfinished and my face will be overall unbalanced. She recommends
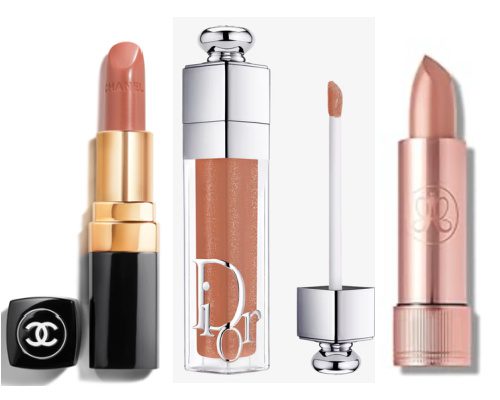
a lipstick or gloss that’s hydrating and has shine so that it’s less likely to settle into the fine lines on your lips or dry them out. AVOID matte lipsticks, they over-emphasize dry lips and fine lines. For daytime, Melissa says to opt for a nude or pale peach color that is enough to brighten up your face but not so overwhelming as to say “hey, look at my lipstick!” For evening, you can go with a deeper or bolder shade but be sure it has shine or add a clear gloss on top. Don’ forget the lip liner! Line just barely outside the edge of your lipline but skip the corners (don’t want to look like Bozo the Clown). Melissa has her own line of lipglosses and liners that I have become addicted to (sorry, Burt’s Bees!). Here’s what I use from her line: M. Franklin Luxury Lip Gloss in Moonshine and M. Franklin Ultimate Lip Liner in Crumb Cake. Other professionals love Chanel’s Ultra Hydrating Lip Color, Dior’s Addict Lip Maximizer Gloss, Anastasia Beverly Hills Satin Lipstick.
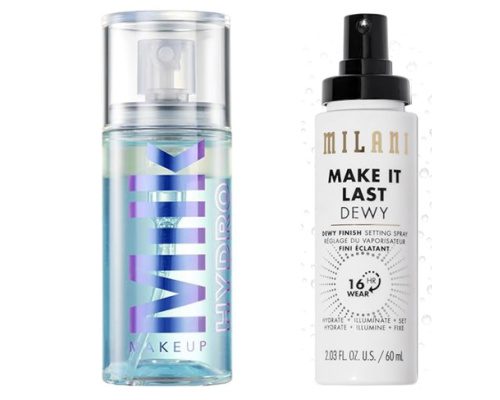
8. Setting Sprays are like hairspray but for your makeup and are critical for preserving your look throughout the day and evening. IIt holds your makeup in place once you’ve finished applying it. Melissa recommends always using a setting spray, but says there are different needs to consider when choosing a spray that will work best for you. Oily skin, acne-prone skin, dry skin, sensitive skin – all should be considered. I really like the Milk Hydro brand b/c it’s alcohol free, vegan, cruelty free and doesn’t have fillers and is a favorite amongst professionals and non-professionals. Milani’s Mae It Last Dewy is also a fave, and is vegan and cruelty free. Melissa also likes the Makeup Saver Setting Mist because of its skin-firming qualities and its oil and paraben free.
9. The right tools for the job: If you’re a DIY’er, you know how important it is to have the right tools to do a job the right way. Well, the same is true for applying your makeup. Melissa suggests that you don’t have to buy the top of the line brush set, but you do need to buy the right brush for the job. This Makeup Brush Guide from Birdie does a great job of explaining different brushes and their use. Melissa has a great paddle-style makeup brush that works fabulously when applying foundation to give you that airbrushed, smooth look. I like her brush, and then I’ve filled in the rest of my collection with Ulta brushes. They’re a mid-price point but have held up well. While most applications are best done with a brush, Melissa says you can also use the pad of your finger to apply or blend creamy makeup. The only tool she’s not a big fan of is a beauty blender because she feels like it absorbs a lot of the makeup you’re trying to apply to your skin.
10. Keep your tools clean! Wash your brushes regularly. They collect oil and bacteria, which you don’t want to keep applying back onto your skin day after day. Melissa just uses regular dish soap to cut through the oils, but if you invest in high-end brushes you might also consider using a gentle fragrance-free shampoo that will maintain the brush fibers. The same goes for your mascara. It should be pitched every 3 months or so, or as soon as it starts to get dry and clumpy.
This should help you be well on your way to a great makeup routine that works well for mature skin and leaves you feeling beautiful and confident. Melissa uses all of her own products in her studio, and sells them to her clients. She’ll also custom-match a foundation for you (color and level of moisturizer and other ingredients to address specific skin concerns). She’ll adjust the tint as seasons change and your skin color changes, if needed. It’s hard to do a custom match online, she really prefers to do that in person. If you’re in the area, make sure you stop by the M. Franklin Studio and Boutique to say hi and shop for her own custom brand of makeup products. Her clothing boutique is also adorable – tons of beautiful, on-trend fashion That’s SO Perfect! for our age range.
Cheers, lovelies!


